How do Themes Work?
A Visual Studio Code theme works just like an Extension. Which leads to the question how do VS Code Extensions Work?
VS Code Extensions are a collection of JSON files in the folder .vscode/extenstions inside your user directory. You can check this folder in your computer by going to the path %UserProfile%/.vscode/extension
This JSON file will contain all the rule mappings of your VS CODE UI elements to your color properties.
Example:
"button.foreground": "#ffffff",
"button.hoverBackground": "#6087cf",
"diffEditor.insertedTextBackground": "#00809b33",
"dropdown.background": "#353b45",
"dropdown.border": "#181a1f",
"editor.background": "#282c34",
"editor.findMatchHighlightBackground": "#528bff3d",
"editor.foreground": "#abb2bf",
Creating the Theme Files
To create a theme you will need to have a folder structure. We have many tools that can do that for us. Here we will be using Yeoman to create our folder structure.
Installing Yeoman & code-genrator
Heads-up
You will need to have NodeJS installed in your computer to use Yeoman
-
Navigate to the folder where you want to create theme.
-
Open terminal and type:
npm i -g yo code-generator-
npm: Stands for node package manager which comes pre-installed with NodeJS, it helps us to download and install packages. -
i: i stands for install. -
-g: g stands for global, it will install the package globally in your computer. -
yo: yo stands for yeoman, yeoman is an open source client-side scaffolding tool which will scaffold the file structure for us.
-
Running Yoeman Code Generator
Open the terminal and run yo code
This guy 👆 yeoman will ask you some questions.
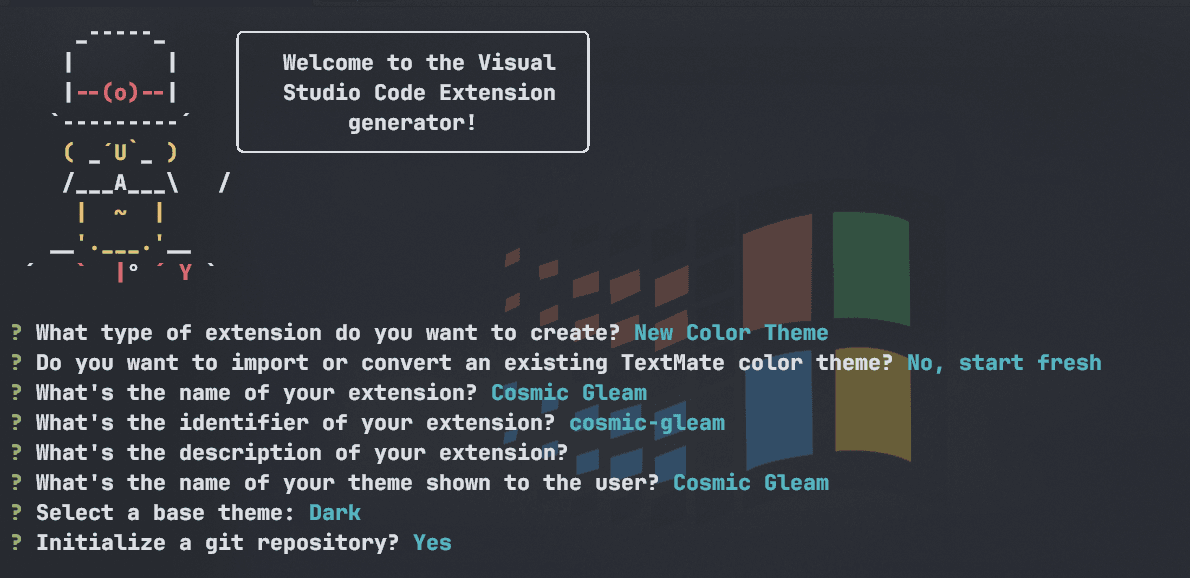
Select the following:
- New Color Theme
- No, start fresh
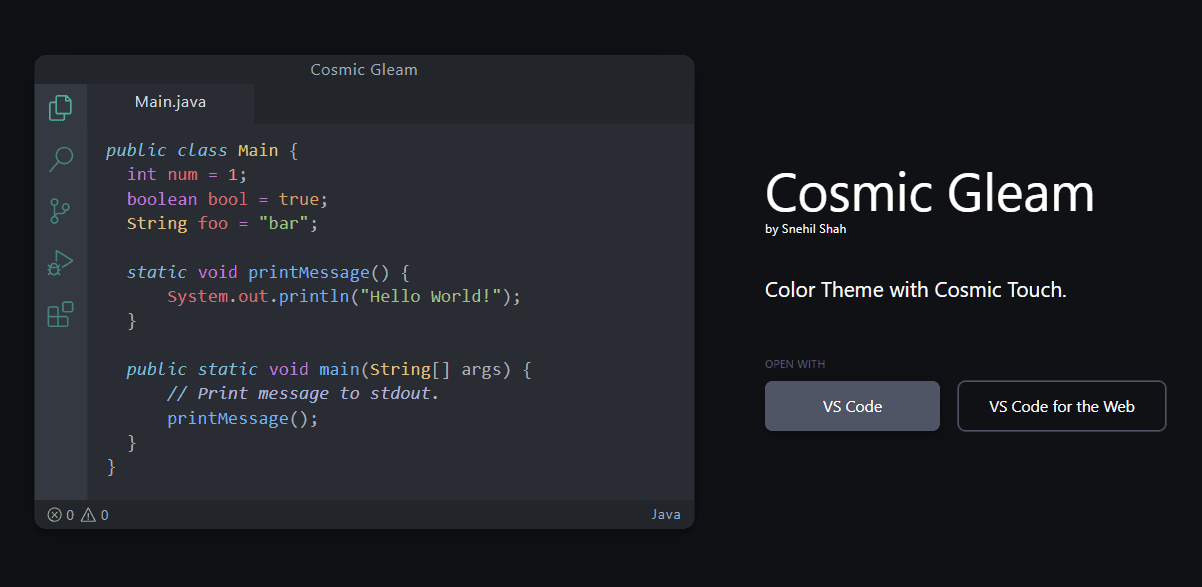
- Give your theme a name, I will be using Cosmic Gleam
- Give your theme a identifier, I will be using cosmic-gleam
- The description of your theme, you can keep it empty for now.
- Give it a Display Name, this name will be show to the user
- Select a base Theme, I will be using Dark
- It is advised to Initialize a git repository, so select Yes
My terminal after entering all the details:
Your Folder Structure must look something like this:
│ .gitattributes
│ .gitignore
│ .vscodeignore
│ CHANGELOG.md
│ package.json
│ README.md
│ vsc-extension-quickstart.md
│
├───.vscode
│ launch.json
│
├───themes
| Cosmic Gleam-color-theme.json
Creating the Theme
Now that we are having the whole project setup, we can start creating the theme.
Open the theme folder in your project and go to the .json file with your theme name.
Here the json files contains all the rules for the theme. You can change the color of any element by changing the value of the property.
To test the theme press F5 or go to Run > Start Debugging in the VS Code Menu. This will open a new window with your theme applied.
Note
Creating a theme from scratch is a very long process, you can use [Theme Generator](https://themes.vscode.one/) to generate a theme and then edit it.
Publishing the Theme
DevOps Personal Access Token
To publish our theme we will need a Azure Dev Ops account. You can create one by going to Azure Website and clicking on Start Free.
Once logged in, Create a Personal Access Token
- Click on your profile settings icon in the top right corner.
- Select Personal Access Tokens
- Click on New Token
- Give it a name and select All Accessible organizations in organization dropdown.
- Custom Define Expiration and set it to 1 year.(Maximum allowed)
- Scroll down and check the Manage Button in Marketplace section.
- Click on Create Button
- Copy the token and save it somewhere safe.(Do not share it with anyone)
Becoming a Publisher
- Go to VS Code Marketplace
- Click on Create Publisher
- Fill in the Name and ID and click on Create Publisher
Configuring Package File
- In your project folder open the
package.jsonfile. - Add a field
publisherand set it to your publisher ID. - Add a field
repositoryand set it to your repository URL.
You can add many more Attributes to the package.json file.
For all the attributes checkout the package.json file from my repository.
You will need to update your
readme.mdfile as you want be allowed to publish otherwise.
Uploading the Theme
Finally, to upload the extension you will need vsce package. Run npm i -g vsce in your terminal to install it.
Login to your Azure DevOps account by running vsce login <publisher-id>, if asked for Personal Access Token, paste the token you copied earlier.
Now run vsce package to create a .vsix file in your project folder. The .vsix file is the zip file of your extension.
Finally run vsce publish to publish your theme to the marketplace.
You can now go to your publisher profile and see your theme published.
Voila! Your Theme is Ready to Share! 🎊🎉
Note
Also share your theme with me and I will add it to this blog
Checkout my Theme